The first was a Straw Oboe. The children were given straws, scissors and a quick demonstration on the shape they would need to cut at the end of their straw. It took some assistance but it wasn't long before we heard the first HOOONK! and "I did it!". Shortly after that the room was buzzing.
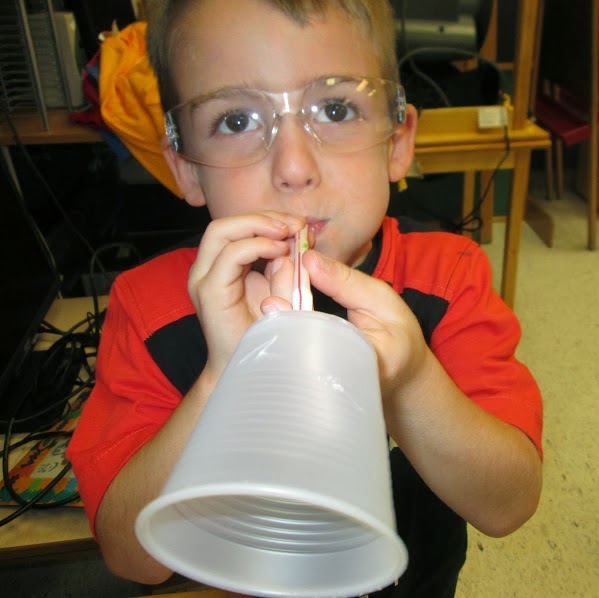 We experimented with the length and even used larger diameter straws to compare the change in sound. The children were provided with various craft materials and we once again fired up the trusty hot glue guns. They were encouraged to both add their own touch and extend the design of their instruments. Some added cups to the end to amplify the sound even more. By the end of the activity everyone had a unique, fun instrument that they could not put down.


The next instrument we explored was the Glove-A-Phone.
Once again the children were given the raw materials and an example.
 After some taping and cutting everyone began trying to play their new instrument. Getting the glove stretched out just right over the paper tubes was a bit difficult for some but once they got the hang of it they could not put them down. These made a much lower, and louder sound than the Oboes so the children were really able to notice the different sounds produced by both designs. The fact that the glove vibrations on the top of the tube in the Glove-A-Phone can actually be observed compared to the Oboe, where the vibrations where occurring inside the mouth, allowed the children to connect the concept that the vibrations are what generate the sound. However the glove vibrates so fast it was hard for the children to see. So we had them feel the top to sense the vibrations. Again we encouraged them to decorate and add on to the deign of their instruments. Some children came up with the idea of gluing or taping one of the craft materials to the top of them membrane to help make the vibrations visible. However they quickly realized that whatever they added dampened the vibrations and the instrument became harder to operate.


