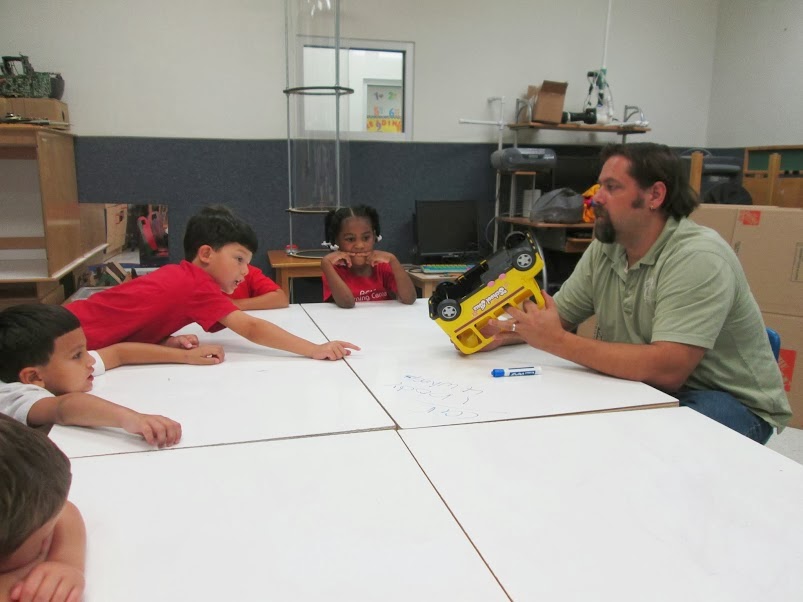
Playing with cubelets is always a fun learning experience. For this group of children it was their first interaction with the cubelets and we decided to try a new strategy for introducing them. We simply gave them the blocks and tried to see if they would make some discoveries on their own. To keep it simple we limited the think blocks to only the battery block but gave them the full range of action and sense blocks to explore. Once they got over the cool way that the blocks connect using magnets, which took up much of the time, they eventually stumbled upon a beep, or a block lighting up, or some even noticed the humming sound coming from the motor blocks before they noticed anything turning. We then used these discoveries to discuss the function of each block. We explored what we would have to do to each sense block in order to trigger the action block. The children were then free to tinker with and combine the blocks to make their own creations. Not bad to be introduced to robotics at the age of 4yrs old and be able to create your own, thanks to the low barrier to entry of the blocks.
A Makerspace/School Fab Lab for the Play Make Share program at REM Learning Center which investigates how the integration of methods such as design thinking, systems thinking, computational thinking, play, making, and tinkering within both formal and informal learning environments can be used to introduce 21st Century Skills and inspire a lifelong love of learning at an early age.
Friday, October 18, 2013
Friday, October 4, 2013
Propellers and Rotors
Inspired by an instructable we had seen recently, and eager to see how fun paper whirligigs would be in our wind tubes, we decided to play with the concept of propellers and rotors.
We started off with rectangular strips of paper and we had the children play with and explore how the paper's orientation, and shape effected the amount of air resistance it experienced as it fell to the ground. When held with the long end horizontal the paper would flip, fall slowly, and move randomly on it's way down. When held with the long end vertically the paper would fall quickly, not flip, and typically landed in the same place. Next we showed them paper whirligigs and showed them how this design combines both the horizontal (rotors) and vertical (stem) paper orientation. We had them cut out their own using the scissors. After playing with them in the room we brought them over to the windtubes so that they could play with their creations and make modifications when needed.
During the next session we introduced the plastic propellers, had them explore it's shape and discussed the similarities and differences of it's design to the paper whirligigs. Each of them spent time making a small rubberband powered helicopter similar to this instructable, and played with its design by changing the shape of the paper attached to it, the amount of times the rubberband was wound up, and the sequence used to launch them. We had a great time.
Friday, September 20, 2013
Rubberband Cars
To get everyone ready for Our 2013 Cardboard Challenge we decided to play with cardboard. We got inspired when we saw some of the things being done by artist Noga Elhassid at the Moving Toy Workshop. Specifically the rubber band cars. So we cut out some basic shapes and had the children design their own toy cars. We started by searching for examples of working cars in the classroom and deciding what were the most important aspects of their design which they all had in common that made them function. They all had wheels, axles, and a body. So using these basic components, and the rubber band we let the children come up with their own windup cars.
Friday, September 6, 2013
Squishy Circuits
We began our school year program with an activity that would allow for the creative, hands on use of technology we were looking for but also provide a low barrier to entry for new students who were not with us during the summer. And besides the children love to play with play doh so what better than Squishy Circuits!
We made our own recipe for conductive play doh and provided the children with all the components required to make a simple circuit (Batteries and L.E.D.).
We led them through a basic activity that helped them organize the parts and layout of a basic circuit.
Showing them how to layout the components so that they form a circle.
After some basic problem solving and observations the children noticed that the L.E.D. had polarity. so if the circuit does not light up it doesn't mean it won't work "I can't do it" it is an opportunity to try and fix something by discovering what is wrong. Pretty soon the room was buzzing with excitement as L.E.D.s lit up and children who solved the problem were collaborating with those who were still working on theirs.
We had some pretty neat creations.
We made our own recipe for conductive play doh and provided the children with all the components required to make a simple circuit (Batteries and L.E.D.).
We led them through a basic activity that helped them organize the parts and layout of a basic circuit.
Showing them how to layout the components so that they form a circle.
After some basic problem solving and observations the children noticed that the L.E.D. had polarity. so if the circuit does not light up it doesn't mean it won't work "I can't do it" it is an opportunity to try and fix something by discovering what is wrong. Pretty soon the room was buzzing with excitement as L.E.D.s lit up and children who solved the problem were collaborating with those who were still working on theirs.
We had some pretty neat creations.
Tuesday, August 6, 2013
Open Design
Over the las few months the children have really been catching on to the concepts that are at the heart of what we are doing in the program. Everyday we hear stories of things that they have made and/or a family member has made.They have mastered the use of both a screwdriver and the hot glue gun. And recently we have begun hearing more and more about what they want to make. So during the last few weeks we allowed them to use the tools, resources, and our skills to come up with a design project and see it through. At first we had them plan out what they wanted to design and make. We then when through what materials and/or supplies they would need.
Finally we stood back and let them get to making. Some of the children wanted to make figures like a mermaid, Spiderman, or Mario and Luigi. So we came up with a generic cardboard figure, we cut on the laser cutter, that could be put together using brass fasteners at their joints. The children then put them together in the configuration they wanted and added props they created, decorations, and other additions. Other children wanted to make rockets, cars, stuffed animals you name it.
Using the laser cutter we were able to assist some in cutting out their drawings in cardboard so they would have a physical representation they could then add to and play with.
What a great summer. It is wonderful to see the confidence the children have gained with the tools and to see grow as makers!
Subscribe to:
Posts (Atom)